A comprehensive step-by-step guide to learn how to start a blog, choose the best blogging platform and avoid the common blogging mistakes.
I started a blog with a mission to inspire family fun and earn extra income for my family. It took off faster than I could have imagined and is inspiring thousands of people. I am able to stay home with the kids and have the flexibility to get them to and from dance and theatre (something I couldn’t do when with an 8-5 job).
When I started my blog, I was serious about turning it into a career and helping other moms who desire to stay home do this as well. I immersed myself and invested in everything related to blogging from research to taking courses. I implemented all the valuable information I learned and was able to make an income from my blog in less than 6 months from my launch date! With the right knowledge and implementation, it is possible to earn an income right away and continue to grow that income as your blog grows. I am excited to share all of this information with you!
It all started with taking that first step and starting a blog. Today, I want to show you how you can get started too and earn an income within your first 6 months of blogging.
This post contains affiliate links and I may earn compensation when you click on the links at no additional cost to you.
Related: Ever wondered how bloggers make money? Take a look at the top 6 ways bloggers earn money here.
Blogging Platforms – Where do I start?
When you’re just starting out, you’ll need to decide where to create your blog. There are several different options – WordPress, Blogger, Tumblr, Wix – just to name a few.
I recommend using a self-hosted WordPress blog (WordPress.org). If you opt for one of the free sites, you’ll limit yourself when it comes to your monetization options. So if your goal is to make money, then you’ll need to make sure your blog is self-hosted.
A self-hosted blog will also give you control over your content and you won’t risk losing everything if that platform closes or decides to shut down your site.
I recommend starting your blog on Bluehost because they are a well known reliable service and offer the cheapest start up I have found. They also offer every option you need to expand as your blog grows. Another bonus is that you will get your domain name for free when you sign up with Bluehost. You can begin with Bluehost for only $3.95/month. This is incredibly cheap to start up a business.
In this tutorial I will show you how to start a blog on Bluehost and how to install WordPress (WordPress is free with Bluehost). Bluehost will be your hosting and WordPress is how you create your blog.
How to Start a Blog
Step 1 – Choose Your Name
First you’ll need to choose a name for your blog. You’ll want a name that ties into your niche so your audience can easily tell what your blog is about.
It may take a few tries to find a name that’s available. You can easily search for names using the search below until you find a domain that is available. If the name is already taken, it will list similar options to help you out. Don’t stress out about the name too much. You can still sign up and get your blog started and select your free domain later.
Step 2 – Set up Your Account
Click here to get started! Then click the green button that says “Get Started Now.” From here, you will select your plan.
There are 3 choices for packages: Basic, Plus and Prime
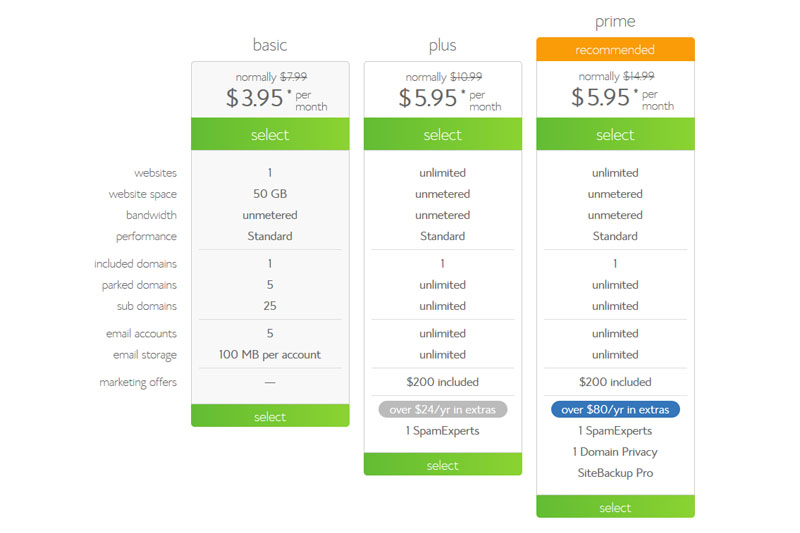
If you are just starting out or limited on budget, the Basic plan is a great choice. You’ll be able to upgrade at any point needed in your blogging career.
But, if you are ready to go all in or already have a large audience, then the Prime plan is a great value because it comes with all types of extras for free. These are: free domain privacy, free SiteBackup Pro, and SpamExperts. You can also run more than one blog from this account for no additional cost (except for the domain name.)
Click SELECT on your preferred plan.
Step 3 – Set up Your Domain
After you select your plan, you’ll have the option to choose your free domain later. This is great if you are struggling to find your perfect name. Once you get signed up and see all the tools available, it might help spark your creativity as you get closer to starting the blog!
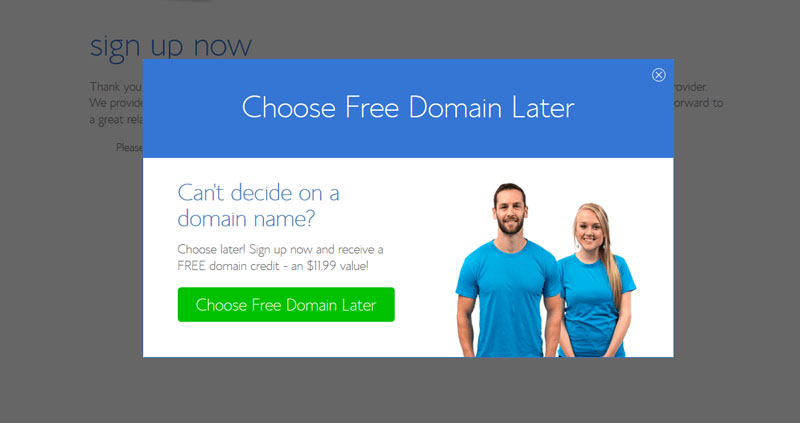
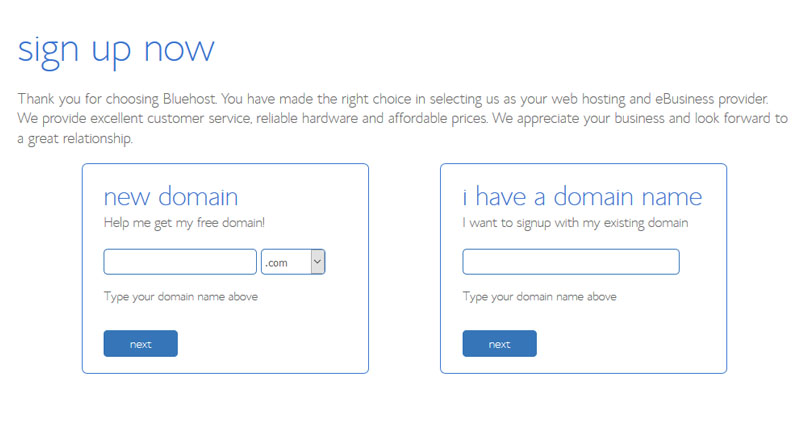
If you already have your domain selected, just click the x to close the window. You have 2 options:
New Domain – If you do not have a domain for your blog yet, enter in your preferred domain name in this box and click NEXT
I Already Have A Domain – If you already own a domain, then enter your domain in this box and click NEXT
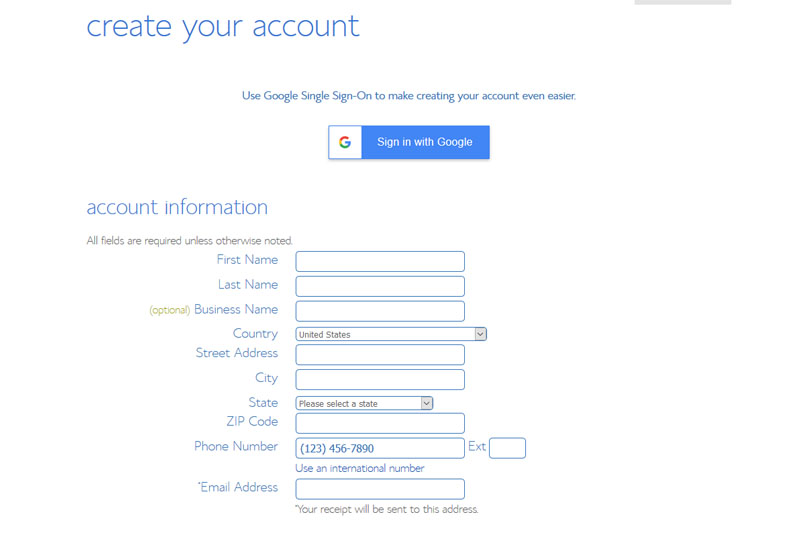
Step 4 – Fill in All Your Information
Step 5 – Package Information
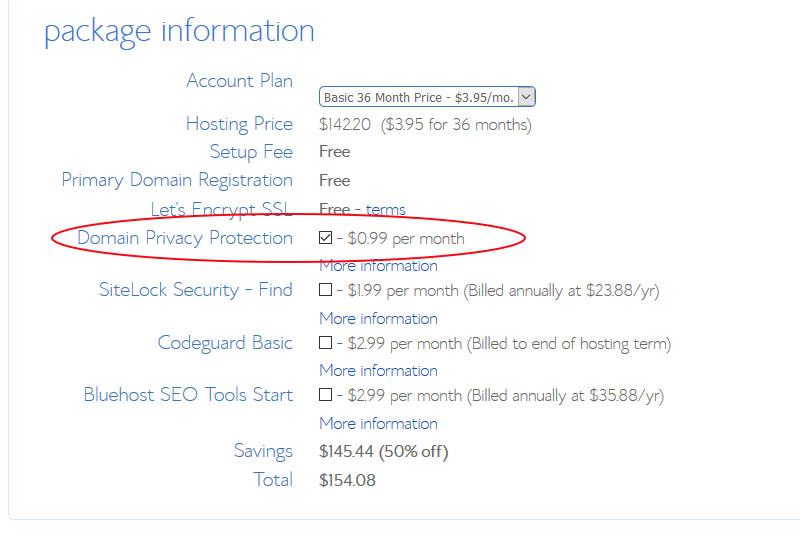
Here you can choose the length of time you would like to purchase your hosting for. You’ll want to choose at least 12 months to get your free domain name. The 36 month plan is the best value if you want to get the best rate.
I recommend unchecking all the extra charges EXCEPT FOR the domain privacy protection. I recommend adding the Domain Privacy Protection so that all of your personal information will stay private.
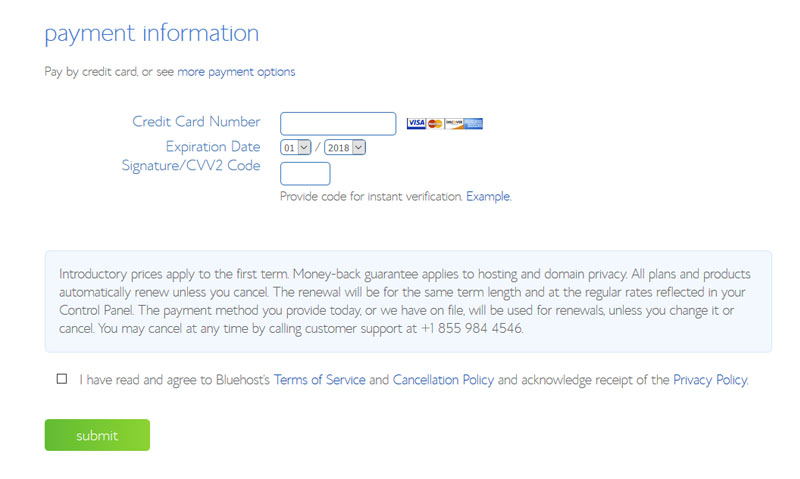
Step 6 – Enter your payment information, agree to the Terms of Service and click SUBMIT!
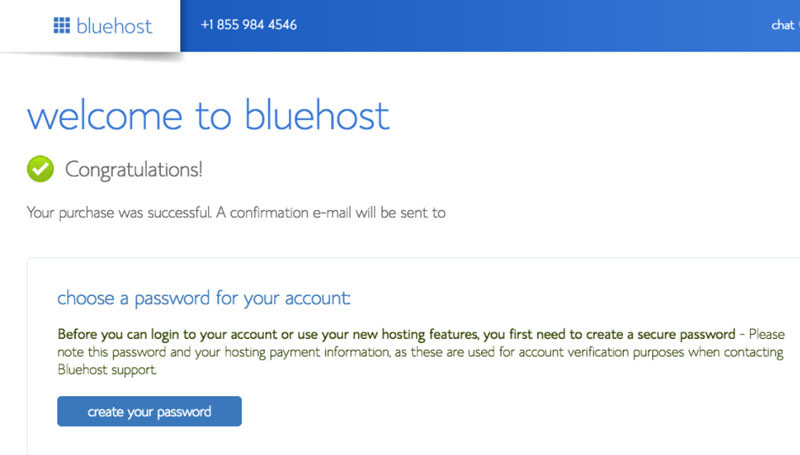
Step 7 – Select a Password
Congratulations! You are on your way to an exciting blogging career! Just a few more steps and you’ll be posting your first post. Hit create your password, then choose your password or have it suggest a password for you.
Step 8 – Install WordPress
Login and WordPress should automatically install. If it doesn’t, select your blog name from the drop down menu and select install. WordPress will install on your blog and not on your computer.
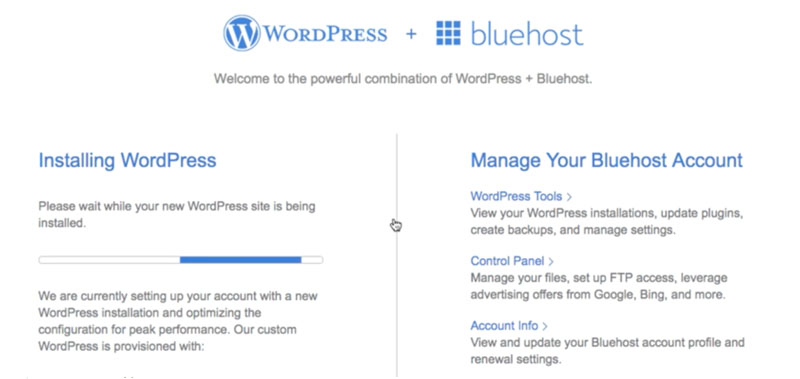
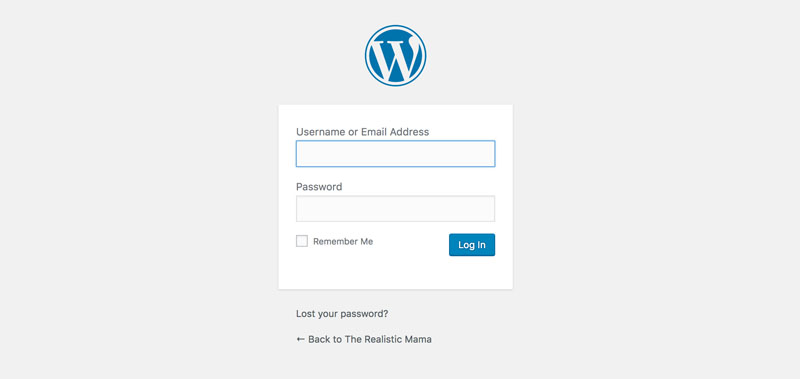
You can then click the button to login or you can access your site anytime by going to your new blog domain and then adding “/wp-admin” to the end. (for example: www.busylovinglife.com/wp-admin is how I access the admin of my site).
If you just finished setting of your blog, congratulations!! This is a journey that will provide a lot of excitement and income for you and your family.
Blogging has gone from being a hobby to a real business that generates a substantial amount of income. If you are interested in making money with your new blog, I highly recommend that you sign up for my free Blogging 101 course here.
In this free course you’ll learn:
- The top 6 ways to make money as a blogger
- How to choose a profitable topic and name for your blog
- Determine your ideal reader
- How to set up your hosting site and create a custom email
- Determine which social media sites you need to set up
- How to create a brand and logo for your blog
- Step-by-step guide to setting up a WordPress blog
- Why you need an Email list and how to set one up
- And so much more!
Here are just some of the fun things I have been able to do because of this blog in just 6 short months:
Free Kidpik Subscription Boxes
Making Snow with the Steve Spangler Science Club
Free Meals with HelloFresh Subscription Food Service
Continue to earn tons of credit for free travel with Airbnb
Family Fun with the Box of Challenge


